Wednesday, 3 August 2016

Felt pins/badges!

Hi guys, Issy here - it's been a while. So a couple of days ago I decided to make a felt pin. I had some felt and thread nearby, so I thought I'd give it a go. I don't claim to be any kind of pin expert (in fact, I've hardly used felt before and I've never made a pin from scratch!) so I was sort of just guessing as I went along...but it turned out pretty well...I think.

This is the front of the pin (the shape on the front is a cloud):


And here's the back:

Here's what you will need:
-a safety pin
-two different colours of felt (or more, or less, depending on your design)
-some thread of around the thickness that you would make a friendship bracelet with (again, you can use multiple colours if you like)
-a needle with a large eye
-scissors
-a pencil

Now I'll give you the instructions, but remember, I'm just writing about my own badge design, so feel free to adapt the following to suit your own.

Step 1:
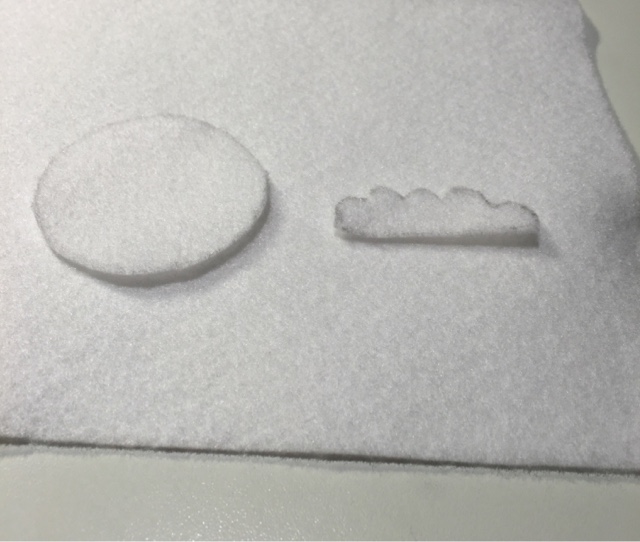
With your pencil, draw on a sheet of felt the shape that you want to have on the front of your pin (a cloud, in my case). Mine is about 4.5cm long for reference. Then cut this out.

Step 2:
Next, draw a circle slightly larger than your first shape - I used my white felt again for this, and to get a perfect circle, I traced the outline of my little box of needles which was, handily, just bigger than my cloud. You can use any circular template, or none if you would prefer. And then cut this out. This is what we have so far:

Step 3:
Now cut a length of thread and put it through the eye of your needle (this proved to be quite a challenge for me, even though I was using the largest-eyed needle that I had, but I got there in the end!). Don't forget to tie a knot at one end so that the whole thing doesn't unravel! Then, using a simple stitch (or another one that takes your fancy), sew your first shape onto the circle. I turned both shapes upside down beforehand so that the pencil outline was on the back and therefore not noticeable.

Step 4:
Take a different coloured felt sheet (or use the same one if you want) and put your work so far on top of it. Draw a circle around it onto your new sheet of felt, making it around half a centimetre larger in radius than the first circle you made. I just went freehand for this bit. Afterwards, cut it out, following the pencil mark.


Step 5:
Time to get out your safety pin! Open it and put it through your larger circle so that the opening/closing half of it is on the side with the pencil outline - this will be the back of your pin.

Step 6:
You guessed it - it's time to sew your smaller circle onto your bigger circle! I used my blue thread again, but obviously you can choose a different colour if you want this time round. Make sure that you sew it onto the front of your larger circle, so that you can still clip and unclip the safety pin at the back.

And that's it! Your very own homemade felt pin/badge. Hope you enjoy it.

Catch ya later,
Issy :)

P.S. Make sure to check out our Instagram: cheekymonkeydiy

Saturday, 2 April 2016

Peseta, Madrid

Hello!
So, I've been on holiday in Madrid for a few days now, and two days ago I found a lovely little sewing shop near the Noviciado metro station, in the hipster-y neighbourhood of Madrid (I'll put details at the bottom if you want to visit it). We were searching for a good place for tapas(a task rather difficult without a recommendation, as we found out) when we I wandered down a little street and saw this store.

What immediately drew me to it was the colourful exterior covered with leaves, but I was delighted when I went inside and realised that it sold sewing supplies!

The brand is normally just sells bags and accessories, but they run sewing workshops and this was one of the shops where they are held, and so they also sell sewing goods. Here are some of the cute handmade bags on sale.

They sold wool for knitting, many lovely fabric buttons as shown here and also some other miscellaneous sewing goods.

The store also sold fat quarters in loads of different patterns. They were slightly expensive, so I wouldn't buy lots, but I think it is worth it for the wide range of unusual patterns.

The English website is:
http://peseta.org/en/

And the address of this store is:
Calle noviciado, 9
28015
Madrid

From Annie

Sunday, 28 February 2016

DIY washi tape

Hey guys!
As you all know, if you have been looking at this blog for some time, I like washi tape. And by like I mean that I have over 40 rolls, and it has overgrown it's original holder, so now it fills up an entire shoebox. Anyways, the only problem with my passion for washi is that it can cost so darn much. I mean, after a quick search I found that paperchase sells it for £3 each, and the official UK mt supplier for £2.75. This means to save money I go to some of the cheaper high street chains- for example, if you saw my insta post, you can see that I got 4 rolls of tape for €2 at Alehop in Spain. And though this tape is still pretty, it's just not as good quality unfortunately. So, trying to seek the resolution to all my washi filled problems, I decided to try my hand at making some of my own tape. And, though it does not have quite the same consistency(can I describe washi tape as that?), it is still pretty good.


You will need:
- some double sided sticky tape
- nice paper
- an empty kitchen/toilet paper roll
-scissors
- a twist tie, or some string and a bead
Here are all the things you need


Steps:
1) Get your piece of paper, and place a strip of tape over one side. For some of my papers, I photocopied them as there was only a small piece, so I would have enough to make more tape.

2) Then, cut along the edge of the tape, so you have a nice long piece of tape covered in paper.


3) If you don't have a twist at this point, quickly fashion a similar item from a bead and some about 9cm string. I simply put the bead on the string, then tied the two ends together.

4) Then, cut a piece wide enough to put your tape on from the bottom of your roll. Wrap your tape around it, and secure with the twist tie/pull your bead through, then put the other end of the thread over the bead.

By Annie


Saturday, 20 February 2016

Elastic bookmark

Helloooo!
As you might have seen from our Instagram, Issy and I just came back from a lovely trip to Granada, where, although beautiful, it rained every single day. Not what we were expecting for southern Spain. But now on to our post. Now, I I know that in these long winter evenings, we all like to read a nice book. And so, I designed this easy bookmark tutorial. The good thing is that the elastic goes around the book, so the bookmark won't fall out.
Also if you need any good book recommendations, please check out Kiki's blog, which posts great book reviews >> http://teenagereadsxo.blogspot.co.uk
You will need:
- two types of fabric
- elastic
- card
- scissors
- a sewing machine
- any ~embellishments~ you want

Steps:
1) Cut a rectangle out of paper, 16cm x 6cm, then pin it to both pieces of fabric together. Cut around, so you end up with two identical rectangles of fabric.
2) Add any embellishments that you want. I made this for a friend, so I put a felt L on mine.
3) Now cut out a 15cm x 5cm piece of card, which will go inside the bookmark to stiffen it.
4) Place you two pieces of fabric right sides facing inwards. Snip a pice of elastic long enough to go halfway around a book. Then lay it inbetween the two pieces of fabric, with a bit poking out at each end. Sew three sides of the fabric together, leaving one short side open. Make sure the elastic is now firmly sewn in on one end.
5) Turn your fabric inside out, so the right sides now face out. Slide in the cardboard.
6) Finally, place the other end of the elastic into the bookmark, and sew up the end.

By Annie

Saturday, 16 January 2016

One year Birthday!

Hi guys!

I'm really happy to announce that it's our one year anniversary for our blog! It has really been a great year. I mean, we began from nothing and now we have way over a thousand views. We have also created our Instagram page so don't forget to check that out at cheekymonkeydiy.
I'm also really happy that we have (tried) to keep posting consistently, even if there are gaps sometimes. We have lots of posts planning coming up such as:
Making sock monkeys
Reviews of different craft books
How to use a sewing machine (in case some of our readers don't know how)
Making your own washi tape
How to make a tote bag

I'm also going to try to keep the posts more conversational, like a normal blog, and they might not all be DIYs, but they could also be other things, e.g. Ways to store washi tape.

Anyway, thanks to all our readers and followers for their support.
By Annie

PS: you can now pin all our pictures if you want to save them for later

Friday, 8 January 2016

Making a reusable calendar- A cautionary tale for crafters

Hello there,
Today I have faced what I can only call a tragedy in my life, so I will do something I do not normally do. I shall tell you a story. Here goes:

Once there was a fair maiden who lived in a faraway land. One day she decided to partake in the novel idea of making a whiteboard calendar. She prepared it lovingly, using the local tradition of 'washi tape', and by the end of this task she was very pleased with her work. Carefully she carried it over to the laminator, and put it in gently. But then, with a horrible roaring and slashing, the little calendar was cut into threads. For this was no laminator, but instead, a shredder. The little maiden cried her eyes out, but there was no more she could do. The calendar she had cherished was damaged beyond repair.

That my friends, is the true story of what happened to me this morning. So unfortunately there is no end picture in this tutorial, however I will put one in as soon as I make another calendar. Here is a picture of the last stage I got to anyway, so it should give you some idea of what it will look like:
You will need:
- A laminator (make sure it is one first)
- A laminating pouch
- A sheet of paper
- Pens
- Washi tape
- A ruler

Steps:
1) Collect your equipment, then turn on your laminator, so it will be heated by the time you need to use it.
2) Draw put a grid on the page, five columns high and seven rows across. For an a4 sheet of paper, my boxes were 3cm x 3.5cm. Put strips of thin washi tape along the lines inside, to mark out the boxes.
3) Write 1- 31 in the boxes, like in a normal calendar. Put a strip of tape across the top of the grid, and draw a line on it where each box begins. Each month work out what day of the week the first is on then write that day on the first section of the tape. Write the rest of the days of the week on the tape chronologically from there. 
4) Then put a rectangle made of tape at the top of the page. I cut each piece of tape in half width-ways for this, so the box will be big enough. This will be to write the name of each month in. I also made an 'important dates' section next to this, so I can see what is coming up at a glance.
5) (I have no picture of this step, as you will understand if you have read above) Put your calendar in the laminating pouch so no paper is poking out the edges, then gently slide it into the machine. It will do most of the moving of the paper, so don't push it, as that could cause wrinkles in the calendar. Once it comes out the end, gently tug it free, then wait for it to cool before using your new calendar. Please use only whiteboard pens with it.

By Annie

Friday, 18 December 2015

Paint marker mugs

Hey Guys!
If you are stuck for ideas for last-minute Christmas gifts, I have a winner right here. Everybody uses mugs, and you can easily customise this present to the likes of whoever the recipient is. E.g. Their favourite movies, TVs programs, bands, jokes etc.
You will need:
- Paint markers. Don't use sharpies!!! I tried that, but it all washed off after once in the dishwasher :( . Mine are from Amazon, and they come with 12 colours. They seem good.
- A mug. It doesn't really matter what sort of quality. I just got mine for £2


Steps:
1) Get your equipment ready. Preheat the oven to 180 degrees Celsius (350 degrees Fahrenheit for all our American readers). With the pens, you may have to shake them a bit, then press the nib up and down a few times before ink starts to come out.
2) Start drawing your designs. I would suggest relatively simple ones, as the nibs are quite thick, about the same as that of a felt tip pen.
3) Place your mug in the oven for 30 mins. When finished, wait a while for it to cool down before you take it out. Then, you can start using your new mug.

By Annie

PS: Here is a picture of some shaved alpacas. I just thought you might like to see that.


Monday, 14 December 2015

Washi tape Christmas tree cards

Hi guys!
Are you not at all arty (like me!) but you still want to make nice, handmade cards for people? Don't want to spend hours copying out finicky patterns? Well, you've come to the right place. These cards take almost no time to make, and they use items you probably allready have.


You will need:
- two pieces of a4 paper. I used the brown for outside, and normal white paper on the inside.
- washi tape, the more designs the better
- scissors
Steps:
1) Collect your materials. Fold both pieces of paper in half, and put the white one in the brown one.
2) Get two short pieces of greenish-coloured tape, and stick them horizontally at the bottom. You could cut each piece, but I like to rip them, as it makes it look more handmade.
3) Get another strip of tape, and put it vertically on top of the two previous ones. Then, keep adding more tape, making each piece shorter until you get to the top. I have a nice gold sparkly tape that I put as the top, as it's similar to the star on a Christmas tree.

Now you've finished, and you can write a nice message inside, and give it to somebody who I'm sure will appreciate your handmade card.

By Annie

Sunday, 22 November 2015

Super Easy Stickers!

Hi guys, it's Issy here. Sorry I haven't been on the blog for a while - things have been a bit busy! But on this peaceful Sunday afternoon in November, I have decided to show you how to make stickers which everyone will love. While stickers in shops are lovely, sometimes it's nice to have homemade ones - and trust me, these are VERY easy.

You will need:
-some plain white sticky labels that you get on rolls/sheets
-pens/pencils (for outlines)
-colours: pencil/watercolour/pen/crayon etc.
-scissors

That's everything! You probably already have all of these in your homes, but if you don't, they are all in abundance in many shops.

Step 1:
Keeping the label on its roll/sheet, draw different things (literally anything) onto it - for this, I like to use a thin black pen, and I make my sketches quite simple, almost like cartoons. Fit as many as you can on the label (your drawings can be any size), but make sure they're not touching, as you want them to end up as separate stickers.

Step 2:
Add some colour to them! Fill in that star, add some green to your tree - make them come to life! There is no wrong way to do this, of course, and you don't have to use any colour if you don't want to; you could have some lovely black and white ones instead.

Step 3:
Simply cut around your drawings, still keeping the label on its roll/sheet. I like to give my stickers smooth, rounded edges, but you can cut yours however you like.

Step 4:
Now that your stickers are all separated, start sticking! Just peel off the back and paste them wherever you want. I'm sure others would really appreciate them if you slipped them into envelopes along with letters, for them to stick down. Who wouldn't like homemade stickers?

I think these stickers are great, because they're so simple to make, they look great, and you can get loads of stickers out of just one label!

If you enjoyed reading this article/making your stickers, we would really love it if you shared this page's link with your friends and family. 

Thanks for reading!
Issy


Monday, 2 November 2015

Pom Pom garlands

Hi Guys!
Yesterday I decided to make some Pom Pom garlands, to replace the paper ones in my room, as it's getting a little colder, and these just seem more cosy and cute. I'm very proud of mine, as they look like they could have come from Oliver Bonas, especially with those colours! It may seem quite painstaking making a lot of Pom Poms, but it doesn't actually take too long, and I just did mine while watching TV.

You will need:
- wool, I would use three or more colours
- a fork (or a Pom Pom maker, if you have one)
- scissors

Step 1) make all your Pom Poms in the usual way* . I made twelve, three for each colour. Trim them to make sure there are no extra long pieces of yarn poking out.

Step 2) Now cut another piece of wool, about 15 cm longer than you want your garland to be. At regular intervals, tie the string around a Pom Pom. Make sure to pull these tight, so no Pom Poms fall off. 

You can now hang up your garland, and make your surroundings a little bit happier. : )

By Annie

* here is a good online tutorial, if you don't know how to make them. http://www.instructables.com/id/Create-Yarn-Pom-Poms-Using-a-Fork/

Sunday, 13 September 2015

Felt popsicle badges

Hey!
Sorry I have posted in a while. We started school again and I have had lots of work to do. For example, did you know that in ionic bonding the metals lose electrons, but the non-metals gain electrons. But anyway chemistry is rather boring and I would rather be sewing.
You will need:
felt (three colours, and a brown)
- a sewing machine (though you can also hand sew it)
- a needle and thread
- some stuffing
- a safety pin
- scissors
Steps:
1 Fold a piece of felt in half and draw out a popsicle shape on it, with two lines each a third down. Cut out the shape.
2 Put the felt on a lighter piece, and draw lines up to the first third, then join them up, so you have drawn a rectangle the size of the first third.
3 Cut this section out. Do the same for the second third.
4 Unfold the main piece of felt, and sew the two rectangles of felt onto it, with the colours going from lightest to darkest.

5 Fold the felt so the two right sides are facing into each other, and sew around three sides, leaving the bottom open.
6 Cut out a piece of brown felt, the shape of a popsicle stick.
7 Turn the popsicle back the right way, and stuff it slightly. Put the end of the brown felt into the popsicle, then sew along the whole edge, so it is now all secured.
8 Using a needle and thread, sew a safety pin (not the side that opens) onto the main badge.

By Annie

Saturday, 29 August 2015

Paint sample bookmarks

Hi guys!

Urrgg! School is nearly upon us. Unfortunately that means more work and lessons, but it also means that you can make some cute things for school. This DIY is good for school, so you can mark pages in any books you are ready in class, however it does't take too long to make, so it doesn't matter if you lose them. This DIY is also quite cute, as you can personalise them for a gift.
You will need:
-paint swatches, you can get these for free at a hardware store
-thin ribbon
-a hole puncher
-any things you want for decoration, e.g. Pens, stickers, tape, stamps
-a laminator if you want to laminate your book marks

Steps:
1) Collect your supplies.
2) If you are going to laminate your bookmark, do so now. Then, hole punch the top of the paper, and decorate it however you want. I put quotes about books on mine. You could also write your initial on it, put a recipe on them, put stickers on it, or doodle on it. Basically whatever you feel like doing.
3) Fold a piece of ribbon in half, the thread through the hole. Put one end of the ribbon through the other and pull. 

By Annie


Thursday, 27 August 2015

Giant Pom Poms!

Hi Guys!
My friend thinks that pompom is a very amazing word, and I must say, I agree. Just listen to the sound of it on your tongue. Pompom. The word itself even conjures up images of joviality. So why don't you keep some of that special-ness in your room, by making some giant ones? They are really quick to make, and you can hang them anywhere. Mine are in my window, or you could put them on your door, or make lots to turn into a garland.
You will need:
-Tissue paper
-String or thread
-Ribbon
-Scissors
Steps:
1) Cut all your papers to size. Mine where about 16cm, but that is pretty small.
2) Layer your papers on top of each other, then fold them in a concertina shape, like a fan.
3) Fold in the middle, and tie some thread around it to keep it in place. At this stage if you want, you can cut the end to make different shapes.
4) Get a longish strip of ribbon to be the loop. Poke one end under the thread, then tie both ends together.
5) Take the first layer of paper and bend it up, away from the other pieces. Do the same to the other half of the same piece. Then, flip and do this on the other side of the pompom. Continue doing this until you have bent all the layers up.
6) Your your pompom may look a bit funny, so just tease and poof the layers until it is looking full. Then you have finished, so go and hang it up somewhere.

By Annie

Thursday, 13 August 2015

Shoebox desk organiser

Hi guys!
We were in France the past two weeks, which was lovely and sunny. However, now we are back in rainy ol' england, where I have an unfortunate incident to describe to you. Two days ago my little brother broke apart my lego desk organiser as he declared his need of bricks for his latest lego star wars project. And I thought, 'Thanks a lot for that, now I have to procure another desk organiser.' And I did. Except this one was much bigger and better.
For this project you will need:
- a shoebox lid
- card, quite strong
- jars, bottles and cartons from around the house (I had two juice bottles, a mini jam jar, and one of the mini cereal boxes you get at a hotel)
- paper with nice patterns, such as wrapping paper
- washi tape (if wanted)
- clear tape
- scissors
- glue

Steps:
1) Collect the things from around the house. Take the labels off any bottles and cartons that you can.

2) Decorate the shoebox lid. I cut some paper doilies to size and stuck them on the bottom, then put washi tape around the top, but you can do any colours or designs you like.

3) Now you will make the dividers. Cut a piece of card as high as the box, and any length you want. This could be as long as the box, or just a smaller piece. Stick it using clear tape to the wall of the box, and to the other wall if it touches. Cut more pieces like this to make squares out of the dividers, sticking each new strip with tape to the box wall or the other pieces or card. You can customise the size and shape of the boxes depending on what you are putting in the organiser. If the card strips are wobbly, stick them to the bottom of the box as well.

4) Decorate your jars and cartons. I put tape around the bottles and jars, and I covered the carton with paper.

5) Put these jars and cartons into the main box. Stick them down with clear tape if they are unstable. Then fill with all your stationary. I put pens and pencils in the bottle, paperclips in the small jar, my scissors, glue, and ink cartridges in the smaller carton, and other staionary in the small boxes.

By Annie

Tuesday, 21 July 2015

Tape crafts

 Hi Guys!
I hope your summers have all been good so far. I was at paperchase yesterday and I saw this big roll of tape covered in watermelons, and watermelons are my favourite fruit, and it was just so summery that I had to buy it. So today I had the idea to base my post around tape. Here are two DIYs which you can make using any big tape you have at home, be it washi or duct.
For both DIYs you will need:
-card (the stronger the better)
-tape

How to make a coin purse:
1- get a big piece of card, the thicker it is the stronger your purse will be.
2- cut the card to the right width, and with a length two and a half times the right length. The half will befor the flap.
3- measure down half the right length, then fold the rest of the card in half up to there, so you form the shape of the purse.
4- cover the whole thing in tape, cutting extra strips and folding them over the seams to seal it. If you want to make your purse extra secure, add some velcro onto the top of the purse and the flap.

How to make a corner bookmark:
1- cut out two squares of card, each one 6.5cm by 6.5cm.
2- cut one of these in half diagonally
3- cover the other square with tape completely
4-cut a piece of tape 6.5cm long, and put it over one of the triangles, but don't fold over the edges. Discard the other triangle.
5- place the square over the triangle, then fold up the excess tape onto the square, so they are now stuck together.

By Annie

Saturday, 11 July 2015

Lego desk organiser

Hi guys!
Issy and I are finally on summer holidays! Yay! Hopefully we'll be posting more as we'll have more time. Comment below if you have any ideas that you want us to do posts on.
 You probably have a lot of lego lying around at home from when you had it as a kid. This DIY is a good way to use some of it up, and it helps to organise your desk, so it's a win-win situation. It is also really simple, so anybody can do it.
You will need:
-Lego (I got mine from my little brother)
-hands

Steps:
1- get all the regular shaped lego you can find, as well as one big-ish base. Make a small wall, one brick high on three sides of the base.
2- get some more flat lego, and lay it out so it covers most of the base. This will be used to make the bottom of the draw. Then stick these all together with long thin flat bits of lego.

3- star to build up a wall on all four sides of the drawer. Add in a small flat brick, so you can pull out the drawer easily. Slot the drawer into the rest of the box to check it fits okay.
4- while the drawer is in the box, build up the box's wall around the drawer. I would recommend three bricks high. Just make sure it is higher than the drawer.
5- make the roof of the box by sticking flat bricks over the top of the wall.
6- if you want to, you can make dividers on the roof by putting the one-block-wide blocks on to make the size squares you need. Then just put in all your stationary!

By Annie

Friday, 19 June 2015

How to put side panels in a top

Hi guys!
Do you ever find that you have a top that is nice, but, well, a bit meh. Why don't you put some side panels in! These make the top look more individual and bright, as well as it being much cuter, especially if you use a contrasting colour or fabric.  Another good thing is that they are really easy to put in. So let's get started.


You will need:
- one t-shirt in need of brightening
- some other fabric
- a ruler
- pins
- scissors
- a sewing machine or needle and thread
1) Cut out a strip of the T- shirt on the side that you want to remove. Cut all the way from top to bottom. Then cut out a strip of fabric the same width and length as the strip of the T-shirt. Pin the two front sides together. Do this for the other side as well.
2) Sew the fabric and top together, taking out pins as you go. Hem the top and the bottom of the fabric strip. Then sew the top and fabric together along all three other seams.
Now you have finished putting the side panels in your top, so go out, wear it and be happy. ; )
By Annie